Month: May 2015

How to call WEB API from ASP.NET MVC

ASP.NET Web API is a framework that makes it easy to build HTTP services that reach a broad range of clients, including browsers and mobile devices. When trying to work on it, the first to come to our mind is how to call Web Api method from MVC Web. Below code snippet helps us understand how to make a call from MVC Web to Web API and return a list of objects from Web API which is connected to the database

EmployeeController is the controller in the web and Index is the action which is called from the web. This method internally makes a call to the WebAPI and gets the resource by using the inbuilt HttpClient of System.Net.Http;

public class EmployeeController : Controller
    {
        HttpClient Client = new HttpClient();
        Uri BaseAddress = new Uri("http://localhost:14532/");
        public ActionResult Index()
        {
            Client.BaseAddress = BaseAddress; 
            HttpResponseMessage response = Client.GetAsync("EmployeeService/GetAllEmployeeDetails").Result; 
            if (response.IsSuccessStatusCode) 
            {
                var data = response.Content.ReadAsAsync<IEnumerable<Employee>>().Result; 
                return View(data); 
            } 
            return View();
        }
    }

The requested resource URL from the above code will be as follows.

http://localhost:14532/EmployeeService/GetAllEmployeeDetails

Dynamic Paging in Kendo Grid

In one of my previous post we came across how to Insert , Update, Delete using ASP.NET MVC in Kendo Grid. If you noticed, i used a custom paging in the page below the grid.Many a times when we use any grid in our page, we always use paging. Dynamic paging helps the users to give their input for their custom viewing purpose as to how many records they need to view in the grid view alltogether.

Add a div in the page to display the paging control. We add a combobox so that we can enter our values as well as some predefined set of values like 5, 10, 25, 50, 100 etc.

kendo grid paging


</div> PAGE SIZE:  
<div id="comboPaging" style="width:75px;"></div>
</div>

The corresponding Jquery method for paging is given below. The Jquery function should be included inside the Document.Ready function of Jquery. myKendoGridName is the name of the kendo grid which needs this paging.


<script type="text/javascript">
$(document).ready(function () {
        $("#comboPaging").kendoComboBox({
            dataTextField: "text",
            dataValueField: "value",
            dataSource: [
                { text: 10 },
                { text: 25 },
                { text: 50 },
                { text: 100 }
            ],
            change: function (e) {
                var grid = $("#myKendoGridName").data("kendoGrid");
                grid.dataSource.pageSize(parseInt(this.value()));  
            }   
        });
    });
</script>

In this example we saw how to add paging in kendo grid and getting user input for paging.

Multiple Excel Files Import to Database in MVC

MVC does not have much of clarity in how to upload a file and read the contents from that file and save to database. In one of my recent project i came across this requirement and after much googling and references from various sites, i made it work. Lets dive into the code part.

Add the following code in the cshtml view.


 @(Html.Kendo().Upload().Name("files").HtmlAttributes(new { style = "width:700px" }))

This code will display a upload control in the web page. The important point to note is that this post will help to read multiple excel files. The below code is the html button code which is used to make form submit on click.


<button type="submit" class="btn btn-primary"><span class="glyphicon glyphicon-cloud-upload"></span>&nbsp;Upload</button>

On adding the above code you get a design like below in the web page.

HTML VIEW

Posting the file to the controller requires form submit. Hence the above two code segments should be placed inside the form tag as follows where UploadFiles is the Action in our controller which will save to the database.

HTML FILES


<form method="post" action='@Url.Action("UploadFiles")' style="width:45%">

Below is the Controller code to be written for importing the excel files to database.


        public ActionResult UploadFiles(IEnumerable<HttpPostedFileBase> files)
        {
            try
            {
                if (files != null)
                {
                    string fileName, filePath, fileExtension, savedExcelFiles;
                    List<MyImportModel> lstUploads = new List<MyImportModel>();
                    foreach (var file in files)
                    {
                        List<MyImportModel> lstFile = new List<MyImportModel>();
                        SetFileDetails(file, out fileName, out filePath, out fileExtension);
                        if (fileExtension == ".xls" || fileExtension == ".xlsx")
                        {
                            savedExcelFiles = "~/App_Data/ImportFolder/" + fileName;
                            file.SaveAs(Server.MapPath(savedExcelFiles));
                            lstFile = ReadDataFromExcelFiles(savedExcelFiles);
                        }
                        lstUploads.AddRange(lstFile);
                    }
                    bool IsSaved = SaveToDatabase(lstUploads); //save the list of objects in database. I used a call to my WebApi here.
                }
                return RedirectToAction("ImportExcel");
            }
            catch (Exception ex)
            {
                return RedirectToAction("ImportExcel");
            }
        }

private static void SetFileDetails(HttpPostedFileBase f, out string fileName, out string filepath, out string fileExtension)
        {
            fileName = Path.GetFileName(f.FileName);
            fileExtension = Path.GetExtension(f.FileName);
            filepath = Path.GetFullPath(f.FileName);
        }

private List<MyImportModel> ReadDataFromExcelFiles(string savedExcelFiles)
        {
            OleDbConnection connectionString = new OleDbConnection(@"Provider=Microsoft.ACE.OLEDB.12.0;Data Source=" + Server.MapPath(savedExcelFiles) + ";Extended Properties='Excel 12.0 xml;HDR=YES;'");
            connectionString.Open();
            DataTable Sheets = connectionString.GetOleDbSchemaTable(OleDbSchemaGuid.Tables, null);
            DataTable data = new DataTable();
            foreach (DataRow dataR in Sheets.Rows)
            {
                string sheetStr = dataR[2].ToString().Replace("'", "");
                OleDbDataAdapter dataAdapter = new OleDbDataAdapter("select * from [" + sheetStr + "]", connectionString);
                var ds = new DataSet();
                dataAdapter.Fill(ds, "DataTable");
                data = ds.Tables["DataTable"];
            }
            List<MyImportModel> lstUpload = new List<MyImportModel>();
            for (int i = 0; i < data.Rows.Count; i++)
            {
                MyImportModel newFile = new MyImportModel();
                newFile.Name = Convert.ToString(data.Rows[i]["Name"]);
                newFile.Email = Convert.ToString(data.Rows[i]["Email"]);
                newFile.PhoneNumber = Convert.ToString(data.Rows[i]["PhoneNumber"]);
                newFile.RegisteredDate = Convert.ToDateTime(data.Rows[i]["RegisteredDate"]);
                lstUpload.Add(newFile);
            }
            return lstUploadExpires;
        }

Name,Email,PhoneNumber,RegisteredDate are all the columns on sheet 1 in my excel file. Below is the design of the excel file i used to upload.

excel

Note: This example will read files only from the sheet 1. The name of the sheet can be any and that has been handled in the code.

Kendo Grid with Insert , Update,Delete in ASP.NET MVC

In this post I am going to explain how to create a Kendo Grid with CRUD operations. I came across this requirementin one of my project that i need to load a table records in a grid view and to perform all CRUD operations in it.

Kendo grid crud mvc

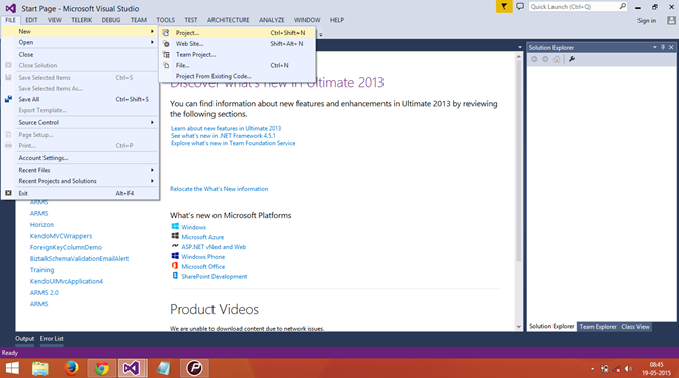
First, create an empty solution in visual studio. I am naming my solution as “KendoGridCRUD_Mvc“. Right click the solution name in the solution explorer and add a new Project under Visual C# => Web => ASP.NET Web Application 

Type a name in the project name and Click Ok. In our case the project name is “KendoGridCRUD“. Select MVC in the next screen and click OK.

Kendo grid crud mvc
Now our solution looks like below.

Kendo grid crud mvc

To use Kendo Grid in our project, in his example i am going to use Telerik’s CDN to refer to the style sheets and Javascripts in our project.

In the Layout page , add the scripts to use Kendo Grid in our project. Add the below URL’s in the project to use Kendo Grid in the Views.

    	<link href="http://cdn.kendostatic.com/2014.3.1119/styles/kendo.common.min.css" rel="stylesheet" type="text/css" />
    	<link href="http://cdn.kendostatic.com/2014.3.1119/styles/kendo.mobile.all.min.css" rel="stylesheet" type="text/css" />
    	<link href="http://cdn.kendostatic.com/2014.3.1119/styles/kendo.dataviz.min.css" rel="stylesheet" type="text/css" />
    	<link href="http://cdn.kendostatic.com/2014.3.1119/styles/kendo.default.min.css" rel="stylesheet" type="text/css" />
    	<link href="http://cdn.kendostatic.com/2014.3.1119/styles/kendo.dataviz.default.min.css" rel="stylesheet" type="text/css" />
    <script src="http://cdn.kendostatic.com/2014.3.1119/js/jquery.min.js"></script>
    <script src="http://cdn.kendostatic.com/2014.3.1119/js/jszip.min.js"></script>
    <script src="http://cdn.kendostatic.com/2014.3.1119/js/kendo.all.min.js"></script>
    <script src="http://cdn.kendostatic.com/2014.3.1119/js/kendo.aspnetmvc.min.js"></script>

Now that we have referenced Kendo Grid in our project, its time for the coding part.
Add the below code in your View(The page where the Grid view will be displayed)

@(Html.Kendo().Grid<ARMS_WebApi.ViewModel.ComponentTypes>()
                            .Name("EditComponentsGrid")
                                    .Columns(col =>
                                    {
                                        col.Template(x => { }).ClientTemplate("<input type='checkbox' id='chkSelect_#= ComponentTypeID#' userId='#= ComponentTypeID#' />").Width(10);
                                        col.Bound(m => m.ComponentTypeID).Hidden(true);
                                        col.Bound(m => m.ComponentTypeDescription).Width(150).Title("Component Type");
                                        col.Command(cmd =>
                                        {
                                            cmd.Destroy();
                                        }).Width(25);
                                    })
                                    .ToolBar(toolbar => toolbar.Create())
                                    .Editable(editable => editable.Mode(GridEditMode.InCell).CreateAt(GridInsertRowPosition.Top))
                                    .Pageable()
                                    .Sortable()
                                    .Scrollable(scr => scr.Height(300))
                                    .Filterable(filterable => filterable
                                        .Extra(false)
                                        .Operators(op => op.ForString(str => str.Clear()
                                                    .StartsWith("Starts with")
                                                    .IsEqualTo("Is equal to")
                                                    .IsNotEqualTo("Is not equal to")
                                                    .Contains("Contains")
                                            ))
                                    )
                                    .Resizable(re => re.Columns(false))
                                    .Reorderable(reo => reo.Columns(false))
                                    .DataSource(ds => ds.Ajax()
                                        .Batch(true)
                                        .Model(mod =>
                                        {
                                            mod.Id(com => com.ComponentTypeID);
                                        })
                                        //.Create(create => create.Action("ComponentType_Create", "ComponentType"))
                                        .Read(read => read.Action("ComponentType_Read", "ComponentType"))
                                        .Update(update => update.Action("ComponentType_Update", "ComponentType"))
                                        .Destroy(destroy => destroy.Action("ComponentType_Delete", "ComponentType"))
                                       ))

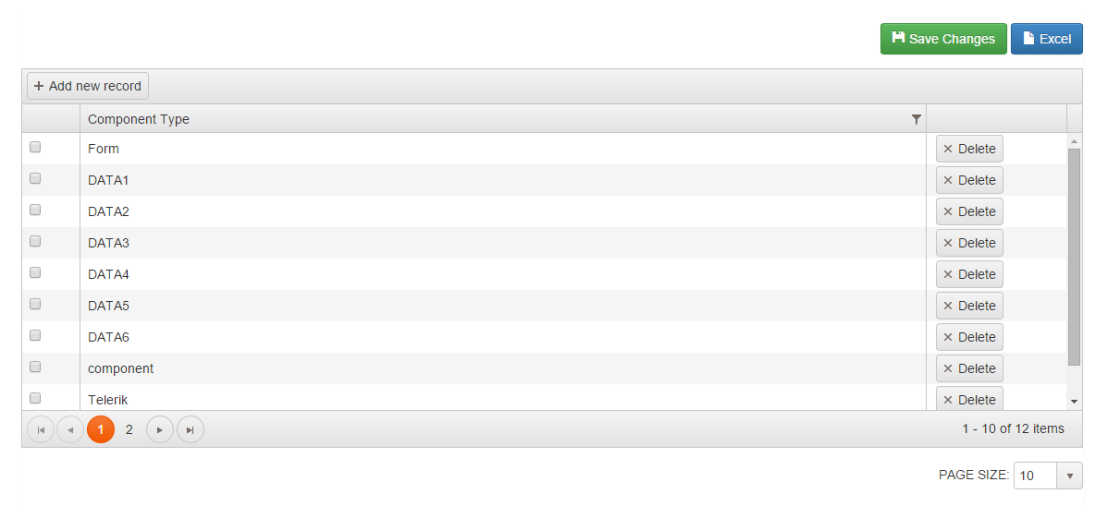
We have two buttons above the grid for saving the grid and to export the grid to excel. Export grid works only for the current page listed in the grid.

Below is the Javascript code for the button click action.

<button onclick="sendData()" name="btnSaveGrid" id="btnSaveGrid" class="btn btn-success"><span class="glyphicon glyphicon-floppy-disk"></span>&nbsp;Save Changes</button>
<button class="btn btn-primary" id="btnExcelExport"><span class="glyphicon glyphicon-file"></span>&nbsp;Excel</button>

The sendData method finds all the changes made to the grid and passes the changes to the Controller Action with three parameters.

function sendData() {
        var grid = $("#EditComponentsGrid").data("kendoGrid"),
            parameterMap = grid.dataSource.transport.parameterMap;

        //get the new and the updated records
        var currentData = grid.dataSource.data();
        var updatedRecords = [];
        var newRecords = [];

        for (var i = 0; i < currentData.length; i++) {
            if (currentData[i].isNew()) {
                //this record is new
                newRecords.push(currentData[i].toJSON());
            } else if (currentData[i].dirty) {
                updatedRecords.push(currentData[i].toJSON());
            }
        }

        //this records are deleted
        var deletedRecords = [];
        for (var i = 0; i < grid.dataSource._destroyed.length; i++) {
            deletedRecords.push(grid.dataSource._destroyed[i].toJSON());
        }

        var data = {};
        $.extend(data, parameterMap({ updated: updatedRecords }), parameterMap({ deleted: deletedRecords }), parameterMap({ new: newRecords }));

        $.ajax({
            url: "/ComponentType/UpdateCreateDelete",
            data: data,
            type: "POST",
            error: function () {
                //Handle the server errors using the approach from the previous example
            },
            success: function () {
                alert("update on server is completed");

                grid.dataSource._destroyed = [];
                //refresh the grid - optional
                grid.dataSource.read();
            }
        })

The corresponding action method in the controller which will be called by the javascript method through an AJAX call.

         public ActionResult UpdateCreateDelete(
           [Bind(Prefix = "updated")]List<ComponentTypes> updatedComponentTypes,
           [Bind(Prefix = "new")]List<ComponentTypes> newComponentTypes,
           [Bind(Prefix = "deleted")]List<ComponentTypes> deletedComponentTypes)
        {
            if (updatedComponentTypes != null)
            {
                //save to the database
            }
            if (newComponentTypes != null )
            {
                //save to the database
            }
            if (deletedComponentTypes != null)
            {
                //save to the database
            }
            return Json("Success");
        }

Thus in this post we saw how to load a kendo grid with data . I have used the kendo grid as a batch editing grid in this example. (Batch(true)). We made changes to the grid by add, edit ,delete and finally saved all changed to the database on a single button click.

Kendo grid crud mvc
In the case of bulk inserting entity framework is very slow resulting in performance degradatiion. I have used EntityFramework.Utilities for bulk insert into the database. I shall explain how to use Bulk insert in another post.